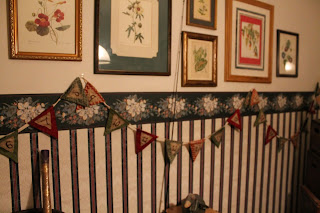
A pennant pocket advent calendar! I loved making this (a great usage of my mom's quilting scraps) and coming up with sweet notes to put in it. And it does have some applications I've dreamed up beyond Christmas decor. For one, it could be a way to store little craft bits (like buttons and fasteners and whatnots). For another, it could be a month-long goal banner! It's rather ambitious, to plan little goals for each day of the month, but I'm thinking it could be a good tool.
Anyway, on with the tutorial!
Firstly, cut your triangles. I cut mine based on 7 inches (so with seam allowances, approximately 6-inch pennants). I did this by measuring a 7-wide strip the length of the fabric. Then, mark 7 inches in. About halfway through this measurement, (3.5 inches in my case) measure to the peak and draw lines to the edges of your 7-inch mark. There may be a better way to make a triangle, but I'll leave that to geometry.
Then, flip your triangle up along the strip (your peaks and bases will alternate), and cut, repeating till you've got as much out of your given strip. You'll need two triangles for each day/pennant you plan on having.
Then, finish the base edge, and press down towards the wrong side. Then, fold the finished edge under to hide the serging (in my case).
Stitch these folds down.
You'll end up with a lot of triangles -- something like this.
Then, with the right sides together, stitch the triangles together -- back stitching at the top edges.
Do the bottom corners by keeping the needle in the thread, lifting the presser foot, and pivoting the fabric.
Then, turn the triangles inside-out.
Use a pin (gently) wedged in the folds to help get all the corners sharp. Then iron flat. I help get the seams crisp by rolling them between my fingers until the seam is at the very edge before ironing.
Cut smaller triangles, (I did so with pinking shears to get the zig-zag look. Non-pinked triangles will fray a bit -- but that could be a good thing!) and write your numbers on them. I used Sharpies, but I would really recommend using a brush-tipped fabric marker. They won't bleed as much.
Sew them on.
And then hand-tack them to a long length of ribbon (I used about 4.5 yards with about two inches between pennants.
Gold Star to all those who love stash-busters.


No comments:
Post a Comment